
OpenVPN, rooter project, and Mikrotik
 Over the past couple of weeks, I have been fighting with getting an LTE device running The Rooter Project to establish an OpenVPN connection with a Mikrotik router. Apparently, OPENVPN is the only option when it comes to VPNs on The Rooter Project. For the purpose of this article, I am going to refer to the software as “the rooter”. This is just to denote the device running The Rooter Project software. In my case, this is a GL.iNET GL-X750 LTE device.

There are two parts to this setup. The OpenVPN setup on the Mikrotik and the setup on the rooter.
Mikrotik Setup
The Mikrotik setup is pretty straight forward. There are some great tutorials out there for a more in-depth setup. The RouterOS version I used for this setup is 6.47.
Creating Certificates
You will need to create 3 certificates on the Mikrotik.
1. cert_export_ca-certificate.crt, 2.cert_export_client-certificate.crt3.cert_export_client-certificate.key
/certificate
add name=ca-template common-name=example.com days-valid=3650 key-size=2048 key-usage=crl-sign,key-cert-sign
add name=server-template common-name=*.example.com days-valid=3650 key-size=2048 key-usage=digital-signature,key-encipherment,tls-server
add name=client-template common-name=client.example.com days-valid=3650 key-size=2048 key-usage=tls-client
Signing Certificates
Once you have created the above certificates you will need to sign them with the following
/certificate
sign ca-template name=ca-certificate
sign server-template name=server-certificate ca=ca-certificate
sign client-template name=client-certificate ca=ca-certificate
Exporting Certificates
Run the following commands to add a passphrase to your key certificate and export them to files
/certificate
export-certificate ca-certificate export-passphrase=""
export-certificate client-certificate export-passphrase=j2sw123com
This will give you three files: cert_export_ca-certificate.crt, cert_export_client-certificate.crt, and cert_export_client-certificate.key. Download these out of “files” from the Mikrotik to the same computer you have access to the rooter on. I like to rename them to ca.crt, client.crt, and client.key so I can keep track of what is what.
Rooter Client Setup
Caveats
I could not find out how to make the operating system read a config file I would edit by hand. Even after a reboot, the config file would not be read. I am not sure if there is a command to read it into the running-config. If someone knows, let me know and that will make this process much easier.
client
dev tun
proto tcp
remote example.com 1194
resolv-retry infinite
nobind
persist-key
persist-tun
ca ca.crt
cert client.crt
key client.key
remote-cert-tls server
cipher AES-128-CBC
auth SHA1
auth-user-pass
redirect-gateway def1
verb 3
In my rooter, the config is in /var/etc. I would cat this occasionally to make sure I did not have any extra options turned on. Since I could not make my edits the file stick, I would make the below changes in the GUI and verify they matched up to my above file.
If your OpenVPN is using a username and password create a file named passowrd.txt and put the username on the first line and the password on the second.
You will need that file along with the three files you generate on the Mikrotik above.
Log in to the router and create you an open VPN instance. In my case, I named it Nexstream because this is who I was working for on this project. You can name it anything you want.

Click on edit and you will be brought to the following screens. Fill them out as shown.
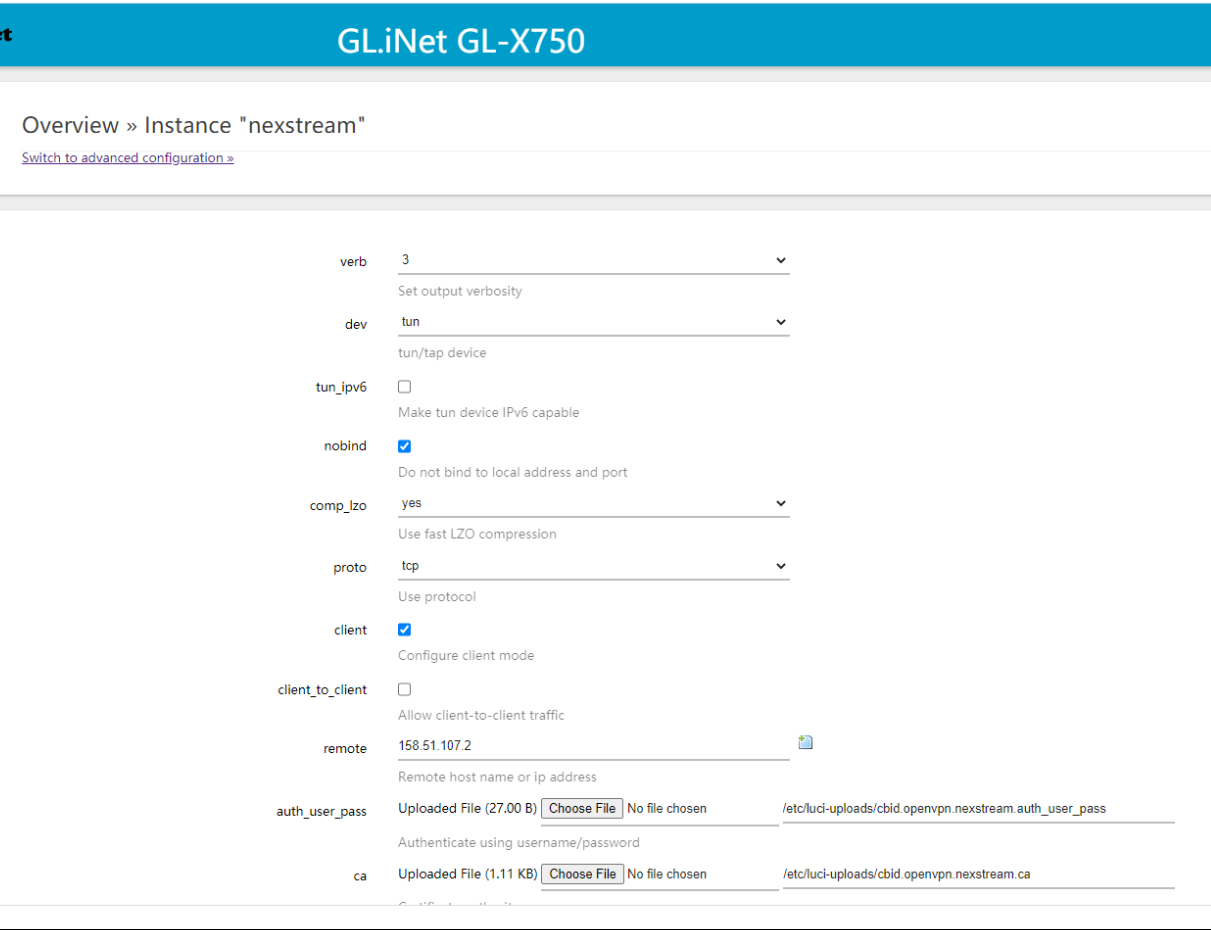
When you get to the bottom this is where you upload your password.text and your cert and key files. If you see anything missing go to the bottom and select the field and click add.
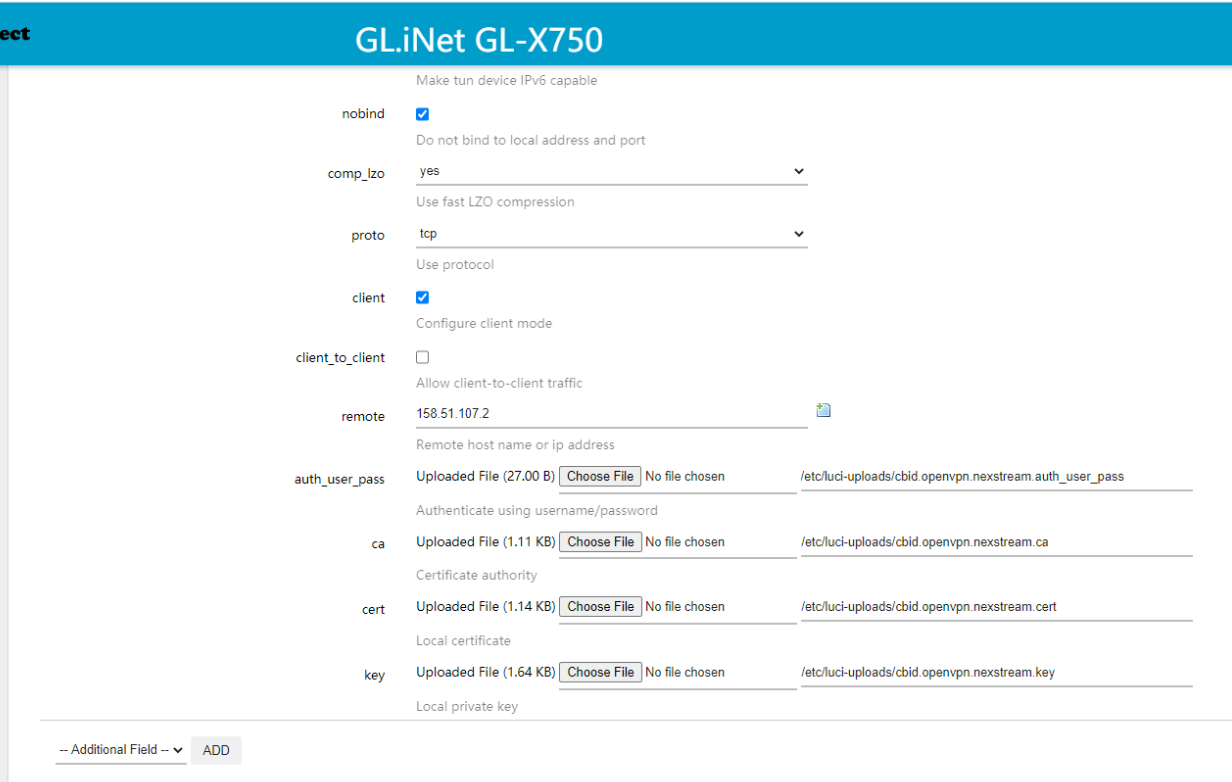
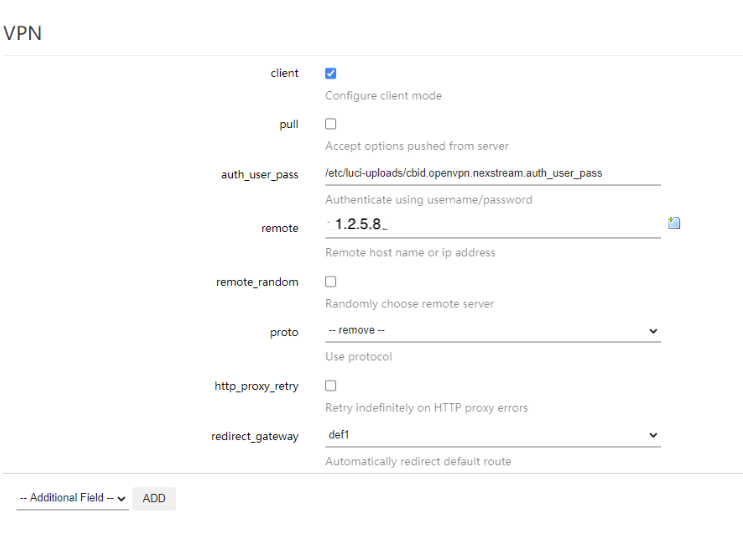
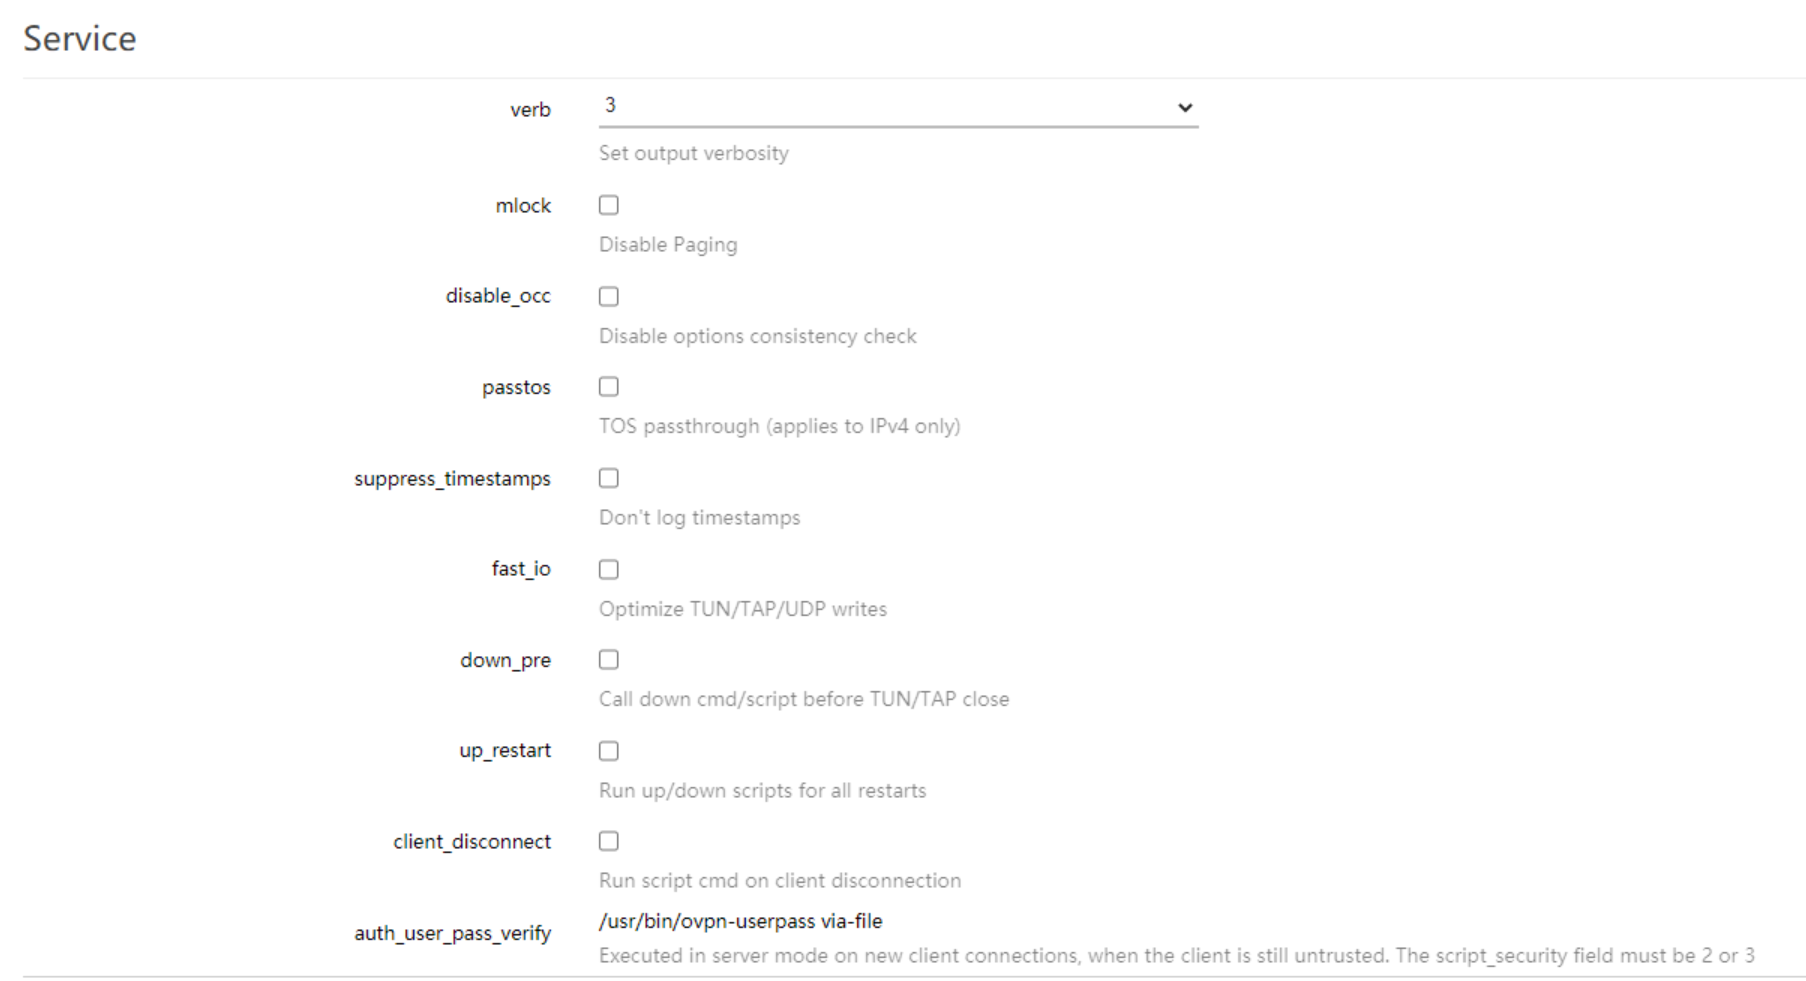
Make sure to hit save and apply before proceeding. Click on “switch to advanced configuration”. Match up your configuration with the following screenshots, which match up with the above config file. You are just basically making the proper checkboxes to match the plain text config I posted above. Again, if anyone knows how to get OpenVPN. on the rooter to read the config in let me know.
Once you have the GUI part done and the certs uploaded to the rooter you will need to deal with the keyphrase via the command line. Simply SSH to the rooter. The below code is a generic code for changing the client.key to not ask for a passphrase anymore.
cd /etc/luci-uploads/
openssl.exe rsa -in client.key -out client.key
Enter pass phrase for client.key: j2sw123com
writing RSA key
Couple of things to note about the process.
1. Your location may vary. You must either be inside the directory with your keys or provide the path to the keys in the OpenSSL command
2.when I uploaded the keys it changed them to cbid.openvpn.FRIENDLYNAME.key.
what my actual code looked like to change the passphrase
cd /etc/luci-uploads/
openssl.exe rsa -in cbid.openvpn.vpnout.key -out cbid.openvpn.vpnout.key
Enter pass phrase for client.key: j2sw123com
writing RSA key
If everything goes well you will be rewarded with the following screen on your OpenVPN main page. If, for some reason, it does not start the system log is actually pretty informative on what is going on.

https://j2sw.com
https://startawisp.info
https://indycolo.net
#packetsdownrange #routethelight